Tuesday, December 11, 2012

RIP Herman, RIP Major Brown

Dear skittish Herman, the youngest of our rescue alpacas
Major Brown, beautiful suri rescue alpaca, just a tiny thing


I'm in a bad mood right now.  If you need to get in touch with us today, wait until tomorrow.  


Monday, December 10, 2012

Haven't even put the wheels on yet (sad face)

Finally found a few moments to work on the vintage Traveleze project.  


My goal of having the floor installed by New Years (this upcoming New Years) has never seemed so far away. My biggest problem is that I cannot seem to muster up the necessary enthusiasm for this part of the project.  The chassis simply does not interest me.

But I'm plodding along (with a large amounts of help from my father who understands how it's suppose to go together).


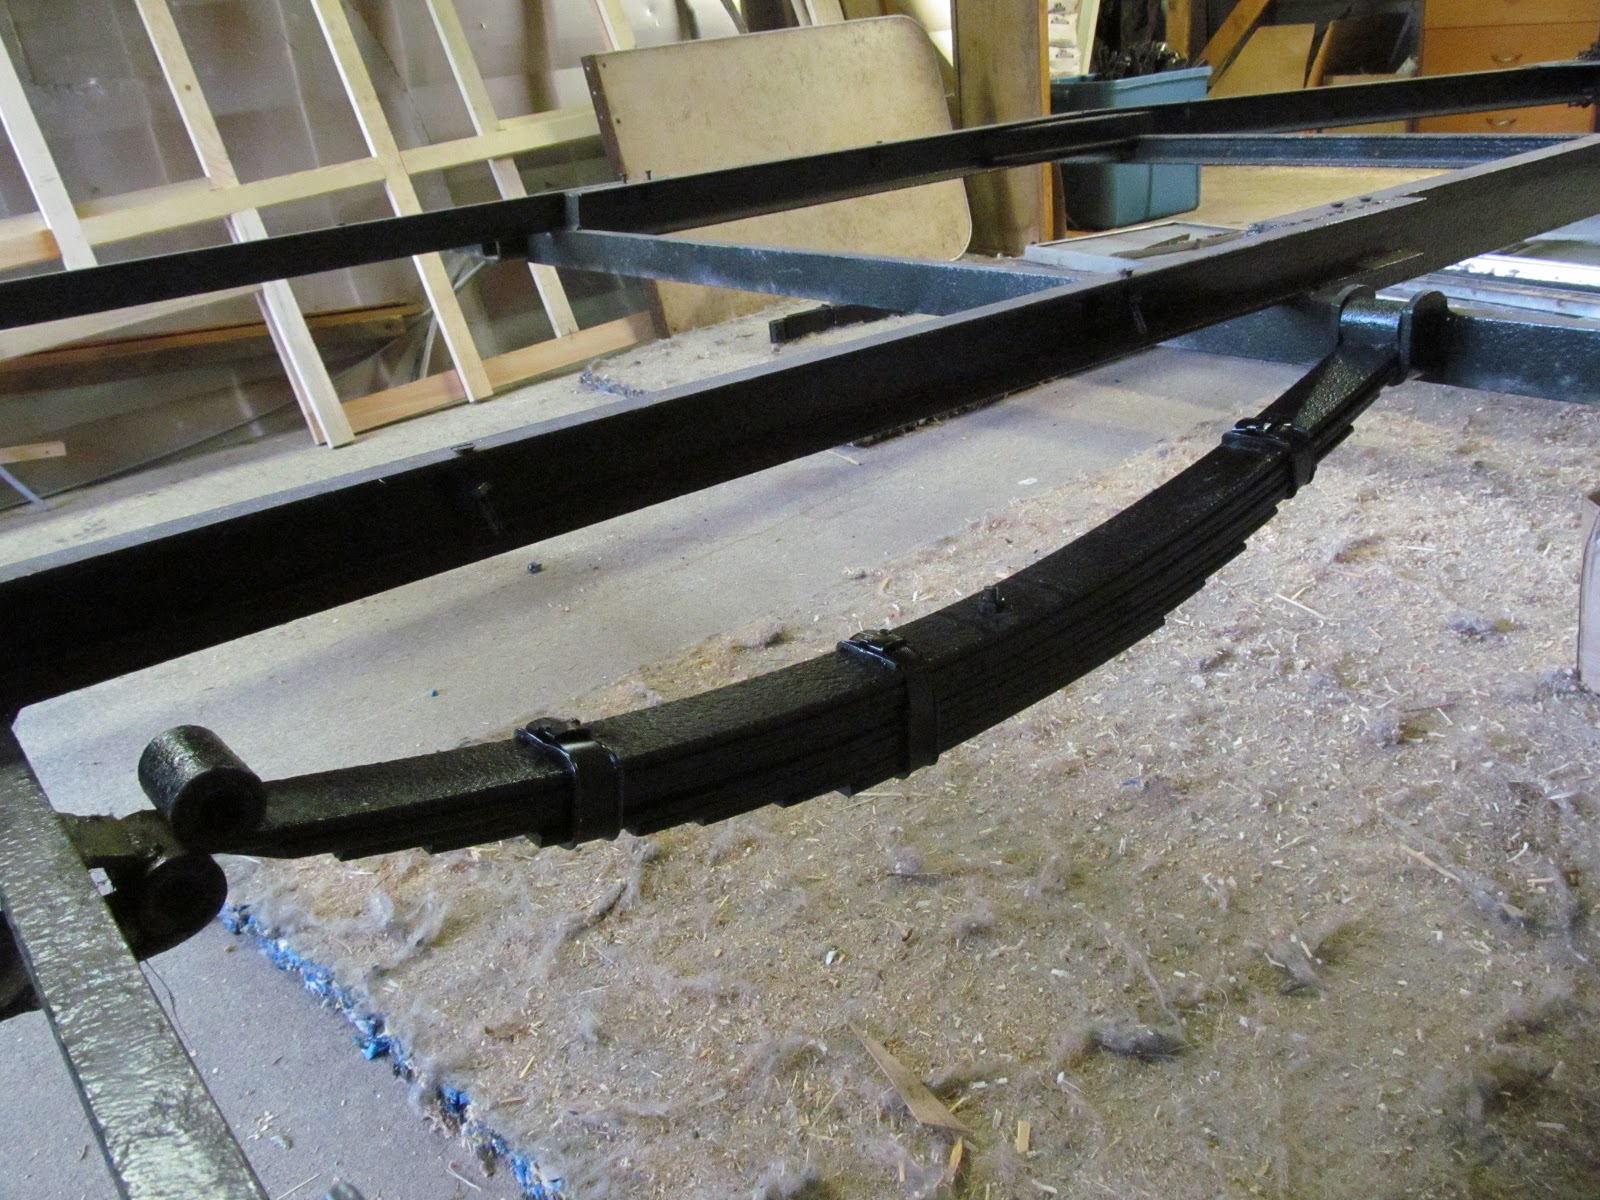
This is apparently a spring.  It's just placed where it's going to go in this photo and not installed yet.  The fun thing about installing the springs is that the bolt like things that hold it in place are 1) heavier than they look, 2) fit really snug, and 3) have this fragile grease nipple (he, he nipple) on them that is easy to break.


Plodding away at it slowly, but it's difficult when you only have a few minutes here and there.  Now that I have most of my holiday chores finished, I can dedicate more time to it.  Been spending a lot of time researching what materials are strong but light, and different construction methods.  Also, looking at fabric swatches to remind myself what the finished trailer is going to look like.  Awesome!  That's what it's going to look like.  I just have to remind myself so I can get through the necessary drudgery.

Anyway, much more frequent blogging this time of year over on my WWFSM, my yummy food blog.  There is bread, bread pudding, and in the next day or two, a recipe for bread made from beer mash.  Also I have my photos almost ready for my first adventure in beer brewing.  Just need a spare moment to write it up.

Thursday, December 06, 2012

Holidays are starting in two days

The next two weeks are going to be really busy with Holiday pot lucks, so I'm probably not going to be posting here as much as I would like.  However, expect lots of food related posts over on Whole Wheat Pastafarian.


Here's something cute for you.  My friend's son's first letter to Santa.


I helped a bit with the words, but he decided that it needed hand prints.  He sticks his hand down on the paper and then tells me to draw around it.  It's really cute.  I think he knows it's a way of saying, 'I did this, this is me'.


We even taught him to lick the envelope.  For some reason he loved it!  Kept licking it until it was a soggy mess.  Oh well, Santa won't mind.

I'm curious, is writing to Sanata (and having him write back) a Canadian thing, or do other countries do this too?

Tuesday, December 04, 2012

How to clean a Vintage Singer Sewing Machine, Singer 127

December is a month of holiday celebration   It is also the month I like to give myself a treat and clean, clean, clean.  The goal is to have a tidy living space in time for the beginning of the new year.  I'm not all that fond of the process of cleaning, but I do like a tidy house, even if it never seems to last long.

I'm starting this month off by cleaning my main sewing machine, my Singer 127 treadle.  If I have a chance I might take apart the treadle base later, but for now I'm just giving the machine a check up and tidy.


Please keep in mind, the process to clean an active vintage sewing machine is a little bit different (and a lot easier) than cleaning one that has been in an attic for most of the century.

I'll walk you through my process for cleaning.  Different people do things differently and there is slight variation between machines, but generally any pre 1948 machine follows the same basic process.  Actually, it will work with most pre 1990 machines, but it's always good to check the manual before tampering with the newer machines.


Things you need to clean your vintage sewing machine

  • cotton swabs
  • good sewing machine oil
  • flat head screwdriver
  • a used sewing machine needle
  • paper towel
  • sewing machine
Start at the top and gently wipe any dust off the outside of the machine with a paper towel or tissue and a tiny bit of oil.

From here on in, at each step, check for any signs of wear or metal scraping on metal.  This will appear shinier than the surrounding metal.  Stop!  I said STOP!  A this point and find out why.  Fix it!  then keep going.  If you don't fix it, your machine will break, and then you can't sew on it until you undergo major repair.  

Also, please see the manual specific for your machine for the oil points.


Next, take off the face plate at the front end of the machine.  Remove any lint or excess oil that has gathered inside during the year (or longer).  Generously oil the needle post (the thing that goes up and down with the needle on the end) and any moving parts you can see.


Also oil at the top of the needle post thingy.


At the front of the machine there is a trapezoid plate.  Some machines have an opening at the back instead.  Some have both.


Open it up, remove any lint or visible puddles of oil.  Lubricate any moving parts and inside the grove (it's kind of hard to see, but if you turn the crank wheel slowly the same direction you would normally sew in, you can see it.


While we are at the front of the machine, clean any lint and oil your bobbin winder.


At the back of the machine is a circular plate, like everything else, clean any visible puddles of oil (there really shouldn't be any here as they only tend to form in the first two.  Oil where it says to oil in your manual (or anywhere things move).


Place a drop of oil in each of the holes at the top of the machine.


Now it's time to clean the bobbin area and the feed dogs.  This place tends to get linty fast.  I find that the used sewing machine needle tends to be excellent for fishing lint out of those hard to reach places.  Check your manual if your machine differs from mine.


Remove the plates, bobbin and if applicable bobbin casing  clean out any visible lint.  Make sure the feed dogs are happy and don't have any obvious damage.  Check to see if there are any needle marks in teh feed dog plate - this is a sign that you are doing something wrong (either using bent needles or tugging at the fabric) or that your machine is royally F-ed up.  Preferably the former.  

Do not oil or put this part back together yet.  Instead, disengage the treadle band and turn your machine on it's back so you can see underneath.


Clean all the lint you can find. Oil according to the manual (or one drop on each moving spot).

Put machine right way up and check again for lint (there is bound to be more that didn't show up the first time).

Oil the racier track and anywhere else that it tells you to in the manual.


Remove the bobbin from the shuttle and take the shuttle apart   Check for burs or anywhere that might snag the thread.  Clean and wipe down with a paper towel that has sewing machine oil on it.  Use a cotton swab to clean the inside of the shuttle, especially the bottom.  Place one very, very small drop of oil in the bottom of the shuttle and reassemble.  


Check for signs of wear on the outside of the shuttle - for example where the needle might be hitting it or it might be rubbing on the racer track too much.  This is a sign that things need adjusting.


Get some scrap fabric and thread.  Sew a whole bunch of stitches.  It will get the fabric oily, so make sure you use scrap.  Adjust the tension as necessary.


This takes me about 20 min if I don't keep stopping to snap photos for my blog ;) however, on a machine that isn't used very often or properly maintained, this task can take hours or even weeks to acomplish.


Monday, December 03, 2012

Vintage Auto Knitter goes back in the box, for now

I'm putting my Auto Knitter back in the box... for now.


I've almost got it working.  I took out every second hook and threaded it per instructed but alas...


Before putting it in the box I took out all the needles, gave them a generous helping of sewing machine oil, wrapped them in paper towel and stored in an air tight container.  Please Note, oily paper towels and cloth, when exposed to air over time, can spontaneously combust and burn down your house.  Keep them air tight and dispose of them properly when no longer needed.


My next step is to order some new needles.  I think that is where my major problem is at the moment.  Some of the needles are slightly bent and several of them have a latch that does not move smoothly.

  From there I will try again on my own.  When - ops I meant to say if - if that fails, then I will get in touch with one of the lovely mentors who have offered their services, and see if they would like to visit our fair town.  Maybe they could host a Get to Know your Circular Sock Machine and Troubleshooting class?

If anyone is actually interested in a course like that in Victoria, let me know.  I'll see if I can arrange one.  It would probably be late January or Fab.  2013.

Sunday, December 02, 2012

Troubleshooting cast on for my Auto Knitter, vintage sock machine

Now that everything is cleaned and put back together, all that remains is to get this vintage sock knitting machine working.  

I've been reading forms, watching videos (like these ones which are for the modern version of this machine), and asking the good people on Ravelry for advice.  I've come to realize two important things: There are some really brilliant people on the internet, and the minuscule precision needed to make this machine work properly makes everything else I've repaired look like a block of wood.  From sewing machines, power tools, spinning wheels, and all the other mechanical goodies I've worked on aren't anywhere close to what this machine is like to work with.

But lucky for me, the first thing I mentioned: those brilliant people who are willing to talk me through this.


This post is basically a bunch of pictures of things I've tried to make the machine work and a summation of many of the helpful tips I've been given.  It doesn't have a happy ending ... yet.  But I'm not giving up.  


The V-cam:


I lowered the V-cam so that it is as low as it can go and not risk jamming.

I also switched the V-cam for the spare that came with the machine.  The one that was in the machine showed signs of wear in one spot where it seems to be rubbing against the cylinder 


The yarn guide:


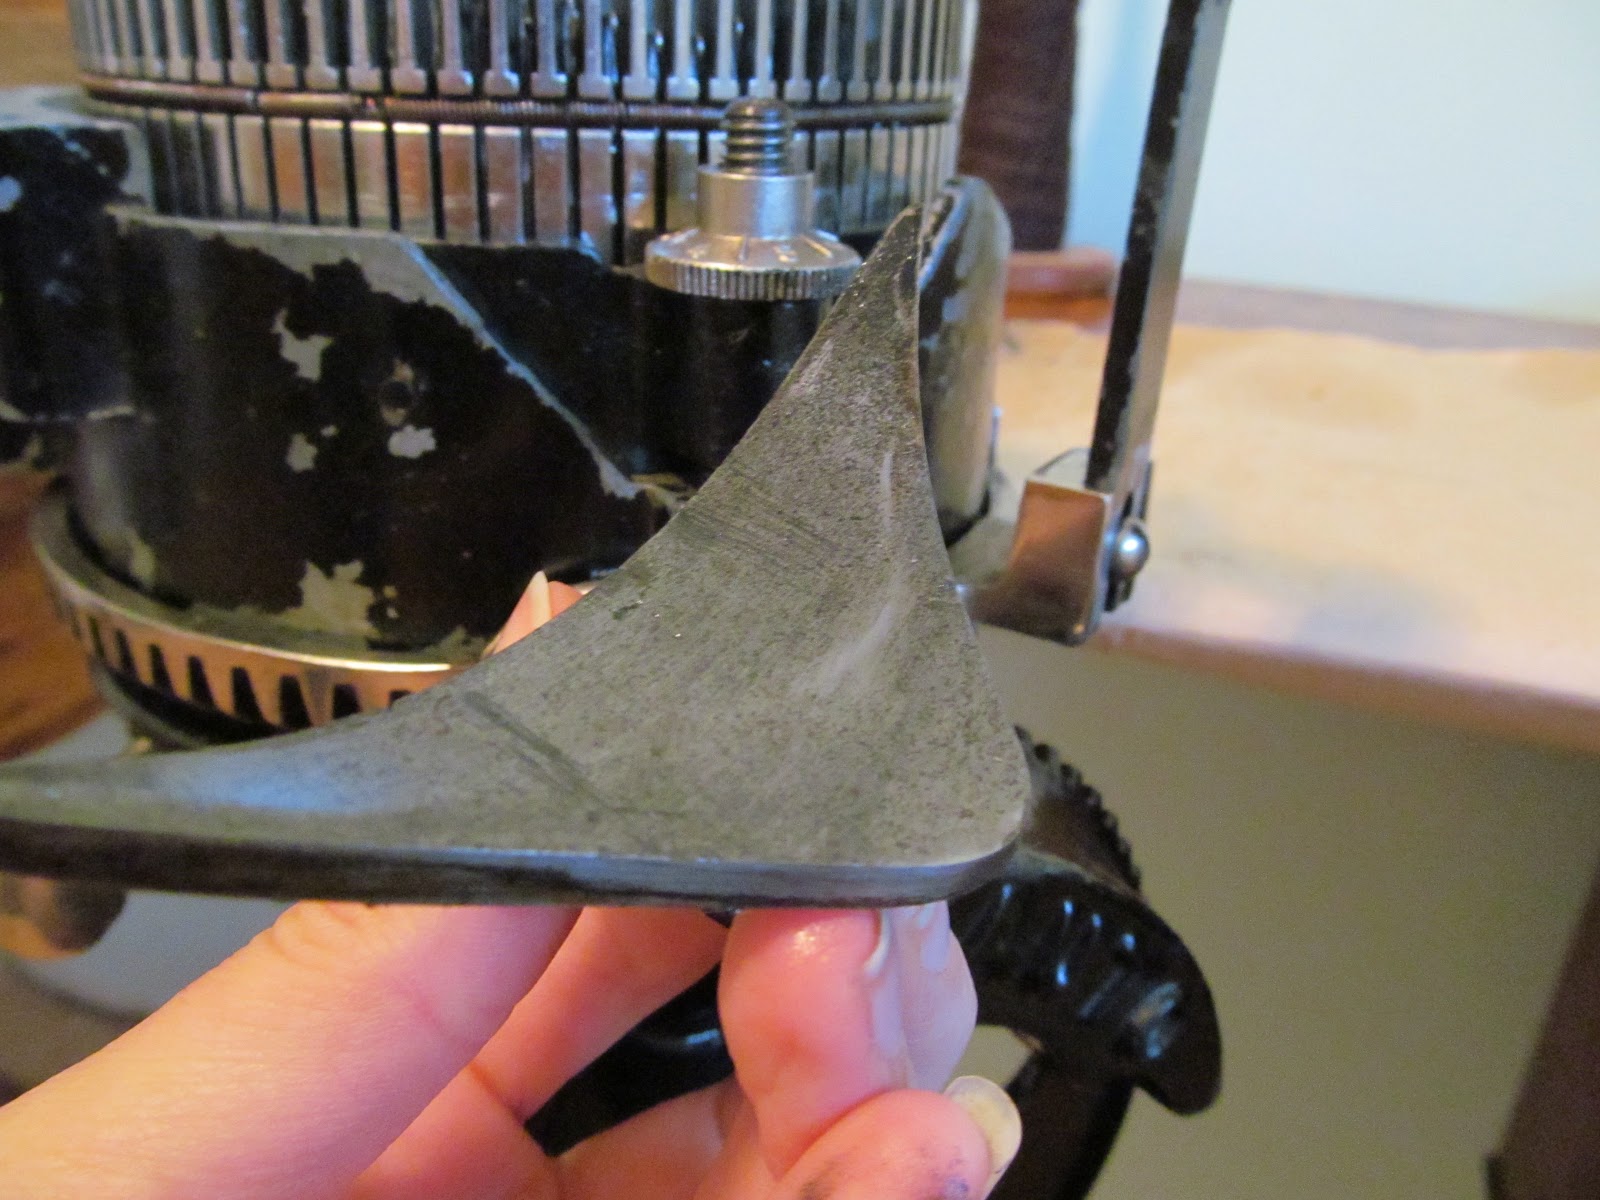
I moved this closer to the needles so that it is almost but not quite touching.  I also lowered it.


And then I lowered again.  


The yarn:


The yarn needs to feed freely from the source to the machine.  So I took some off the spool and let it lay loose.  Later on, once I've fixed the spool winder, I'll use some cheep sock yarn from my stash and see if this works better.


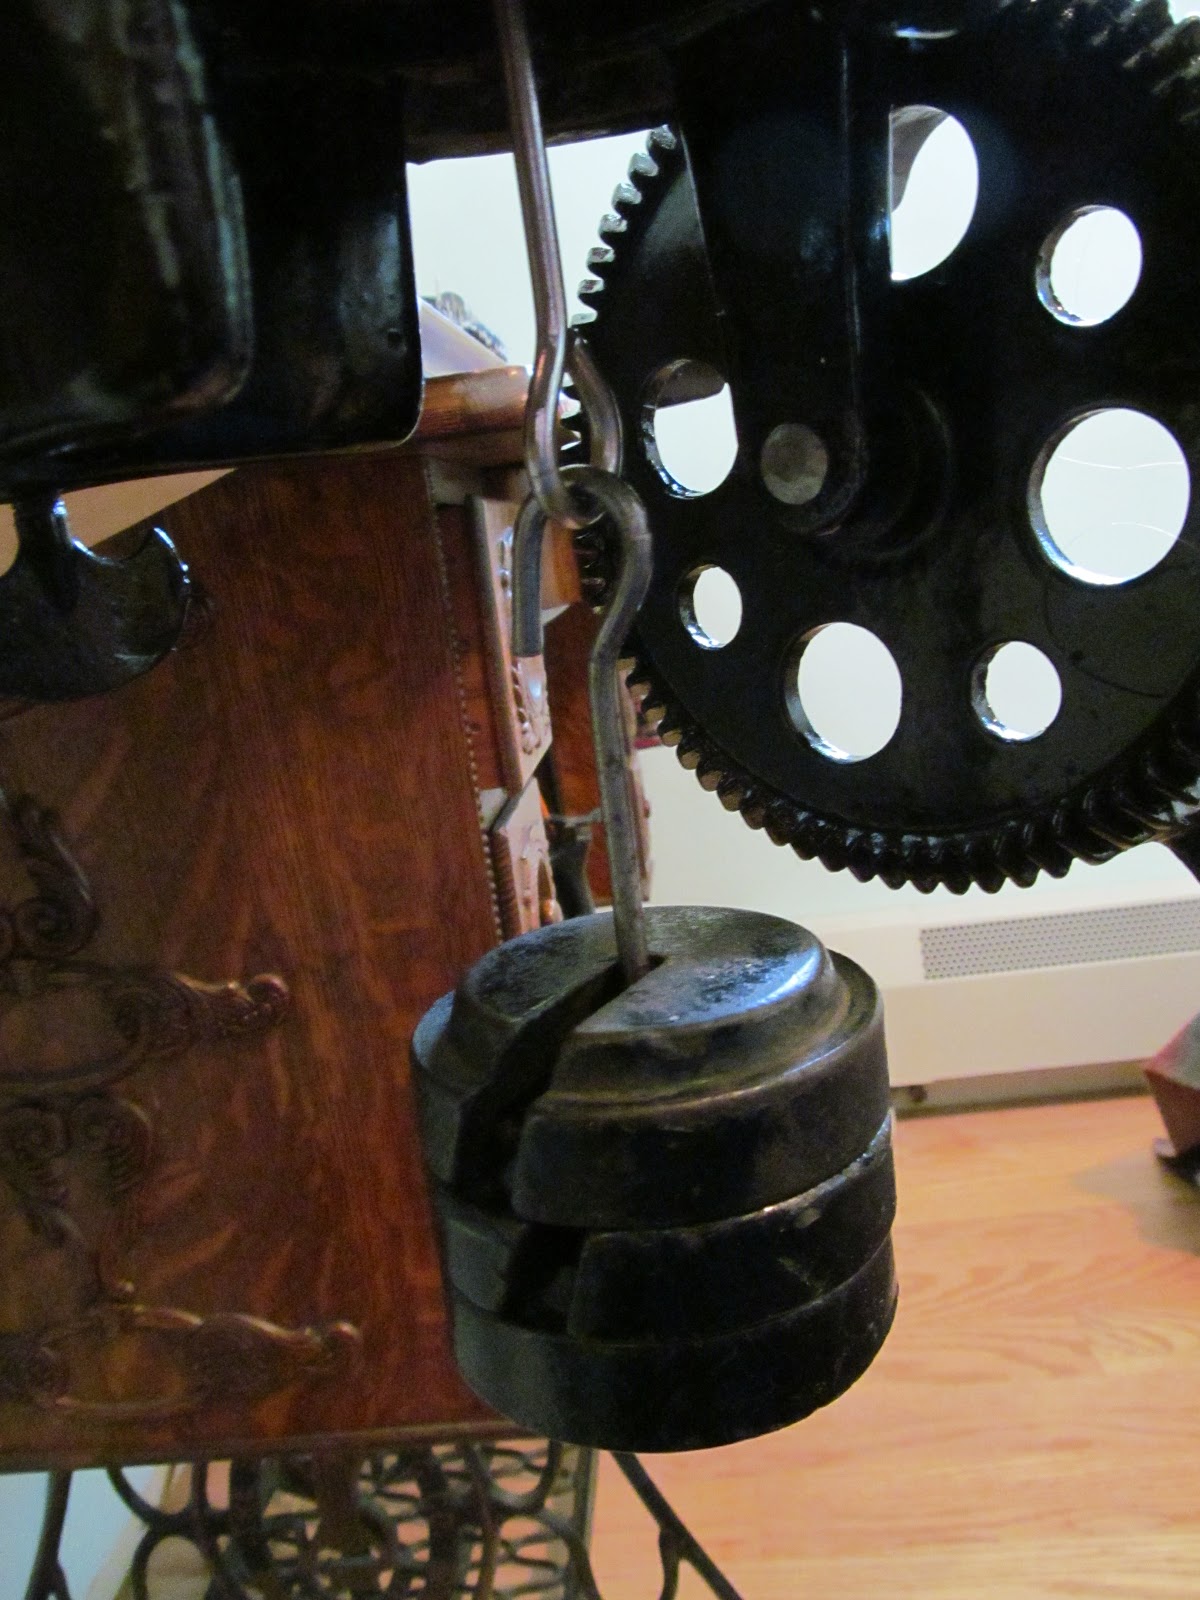
The weights:


Am I using the proper amount of weight for this task?  I really don't know.  


Apparently the weight is very important for the correct formation of stitches.  Each of these disks weighs about a pound, so I thought I would try three pounds.  Maybe next time I'll put the fourth on and see if that works better.


Casting On:


It's often been said that threading every second needle makes casting on easier.  I think it makes it so the yarn does not get wound too tightly on the needles.  


As you can see, there is still something wrong.


My next steps in the trouble shooting process
  • try a different yarn
  • get new needles - Angora Valley Fibres has them for sale.
  • and as a final effort, find a mentor.  A few people have been in touch, but all of them live out of town.  But I suspect there are enough people in Victoria who are interested in learning about these machines. Some of them even have a machine or two in the basement waiting for guidance.  Maybe some sort of clinic or workshop is in order?

Thursday, November 29, 2012

Auto Knitter Made in Canada

Meet the Auto Knitter, a circular sock knitting machine from 1924.


An early Holiday gift from my father, and one that will put to great use, once I get it up and running.

Machines like this were very popular during and just after the first world war.  A person could buy a machine and a contract to produce socks.  Some companies even gave the machine on condition that the person would produce so many socks for free.  Sadly, many of these did not survive over time, often being melted for ammunition during the second world war.

This machine came with some excellent documentation, including the original contract and bill of sale.  In the year 1924, a Mrs. M. C. Russell of Malrose Ave. South, Hamilton, Ontario paid the sum of $60.85 for 1 duplex machine.  (if you are a descendent of Mrs Russell, feel free to get in touch, I can scan you a copy of the materials that reference her.  There are more details than what I'm posting here.  There is also material referencing a Mrs. W. Wilson of Emerald St. North, Hamilton who was a "successful worker in Hamilton" of the Auto Knitter Hosiery (Canada) Co. LTD.).

A worker, would be required to buy the yarn from the company, 2 and 1/2 lb of yarn making a dozen pairs of socks.  Then the company would buy the finished socks back from the 'knitter'.  Pretty cool cottage industry eh?

the spring holds the needles in place,
and this little bar thing holds the spring out of the way
when you need to work on several needles at once.

This machine is in fair condition.  There is some definite wear marks, but everything is here, including extra cylinders and ribbers.  It had been stored somewhere where it got saw dust on and in it.  Sawdust sticks to machinery like a red wine stain to a white shirt.  Things like sawdust and lint, then attract moisture, and moisture when combined with metal over time causes rust.  Lucky for me it wasn't too bad, but did need everything taken apart  cleaned and re-oiled.  A tedious and time consuming, but the kind of finicky repetitive work I love.

With everything cleaned and reassembled, it's time to cast on some knitting.

weird looking tool for casting on work
The amount of difficulty I've had trying to get the knitting started has helped me to understand why people didn't stop their work very often.  What they did was knit one sock, then a few rounds of waste yarn, then another sock, then some waste yarn... separating the socks at the waste yarn and finishing them by hand.  That way, if done correctly, they would be able to knit for years and never need to cast on.

from the auto knitter manual

from the auto knitter manual


I'm not the only one who has had trouble casting on.  Included in the documentation is a letter from the company providing extra advice.  But even following that advice, I can't get it to work.


I'm either all tangles or braking yarn.

Eventually I'll make it work, or perhaps find a mentor at the local machine knitting guild.  There don't seem to be many tutorials online, so now I have a good idea for a future post.

Wednesday, November 28, 2012

You are wonderful! This blog goes on.

Wow, you actually like me.

Thank you.

To be completely honest, I stayed away from the internet yesterday, after I posted my request.  I was nervous to see what sort of response I would get, if any.  It's my fault for not knowing you guys better.

Thank you so much for your kind words and donations.  I have enough to now to keep going with my blogs for a little over a year, which is WONDERFUL.  Almost as wonderful as you are.  Thank you, you know who you are.

I wish I had better words to express how much this means to me and how much motivation you've given me.      The best I can think of is that you people have been a source of light in the dark.  It's no where near poetic enough.

Due to the fact that most of this month has been November, and it looks like the rest of the month is going to do the same, I haven't kept up with my internet.  The next few days are dedicated to catching up on my emails, etsy, ravelry, and all the rest while I think about the future of this blog.

Oh, I also have to take care of my ailing chicken, Henny Penny (she's the bestest chicken ever!) who has something weird going on with her toe.


What shall my goals be with this blog?

First and foremost  I need  to remind myself of my mission statement (see top of page) and focus on positive things that inspire me.  

Next, I think I would like to focus more on tutorials and educational goodies.  I feel that a lot of my posts are more along the lines of 'hey, look at this neat thing I found'.  That's not a bad thing, and there is no way I can keep those kinds of posts from creping up, but I think it would be nice to add some more useful information to the internet.

Also, I'm really keen to document the restoration of the vintage travel trailer.  Well, I say restoration, but it's technically a rebuilding.  Many of the surface elements will be like original, with hidden elements (like awesome insulation and fridge) quietly sitting in the background.

I wonder about this kind of post, where I basically think out loud.  I don't know if they are inspirational or if they add anything to the verbal diarrhoea that is the internet.

Another thing I don't like, but isn't going to change unless I brought in an editor from outside, is the terrible spelling.  And, the fact that I only do one or two revisions on a post before it goes live.  Terribly dyslexic combined with terribly impatient means that I would have to try a whole later harder before my blog could be as awesome as Just Bento or Food 52 (both take the most amazing photos - how do they do that?  I want to be just like them if I ever grow up).  As much as I would like to, I don't imagine I could ever be in the same league as them.  But at least it gives me something to aspire towards.

Most of my food, cooking, recipes, and even food related farming will probably move over to my Whole Wheat FSM blog.  I know it doesn't get very high rankings on the search engine yet, but it's a lovely, clean blog, where you don't have years of self indulgence to wade through to get at the good stuff (yes, that's probably no the healthiest way to think about myself.).

Speaking about lovely, clean blogs... this blog is a mess.  It is my goal to change the formatting slightly, update the links, find a working form of advertisement so that the blog can fund itself.


You told me that you like me, and that means a lot to me.  Please tell me your thoughts. What brought you here?  What is it that made you stick around?  What would you like to see more of?


Tuesday, November 27, 2012

Do you like this blog? Seeking help, please read.

After the goodbye post I wrote the other day, I've been kind of bummed out

Looking back at my blog, I'm really amazed at all the things I've done.  In some ways it's hard to imagine that it was really me who wrote those words and took those photos.  Given how much my illness changed me (emotionally, physically and also to some extent, brain chemistry), it is like I was a different person then.

This started out as a knitting blog and release for my hypergraphic tendencies (I have a compulsion to write things down).  It was a chance to focus on things that inspire me and to share the positive aspects of my life.

Over the years, it grew into something so much more than that.   There are tutorials, recipes, farming stuff, restoration of antique and vintage textile tools, spinning, weaving, sewing, and many other topics.

There are periods of silence, when I'm struggling to find positive things in my life to write about, but I have always come back to you in the past.

I like to imagine that sharing my experiences have been useful, or at least entertaining to others.  That, more than anything, is why I would like to keep on blogging.

The problem is, I've run out of space on my blog hosting site.  To keep writing on this blog I will need to buy a subscription.  The subscription costs about $2.50 per month, which should give me enough space to keep me happily blogging for a year or two.

It may not seem like a lot of money, but to me it is.  I don't talk about it much here, but I'm on a very small disability pension and need to be very careful with my cash.  Maybe you can read between the lines a little and realize when half the price of a cup of coffee is too much, things aren't going so well.

Priorities could be changed and I could find the money somewhere, but I don't know if it is worth it.  Do people actually find my ramblings useful, entertaining, enlightening?

I could always switch blog hosts and start a new blog elsewhere, but unless this stays active, the content will slowly dwindle away and be lost.  Besides, this blog has been around so long, it very high on the search engine list, which makes it really awesome.


That's why I'm asking you for help.

(why is asking this so difficult for me? it seems like everyone else on the internet doesn't have this problem, so why do I?)

Can you show me that it's worth keeping on with this bog?  


If you like anything about this blog, please donate $2.50.  More is okay too.

If I can get enough for a year's subscription ($30) to expand the storage space on this blog, then I'll keep on writing with great enthusiasm.  Not just here on Trampled by Geese, but also on my somewhat secret food blog, Adventures of a Whole Wheat Pastafarian.  It will also help to keep my Lyme blog up as a reference for anyone struggling with the illness (although I don't blog there much any more as it makes me sad).

If we get to $30, then I'll know that it's actually worth while sharing my time and adventures with you all.  Otherwise, well... what's the point?


Thank you for reading.


ps. If I keep on with this blog, I'm thinking of selling advertising space but not really sure how to go about it.  Google adds aren't all that super for me as they don't seem to target the right demographic   Please get in touch if you can think of anything.


Wednesday, November 21, 2012

inspiration

Mostly I'm just writing this post to see if I can upload photos to my blog any more.  But if it works, it's a really inspiring photo of a cup I found somewhere on the internet.  Sorry, I lost the link, but if it's yours, please tell me so I can give it a proper linkback.


Tuesday, November 06, 2012

SALE at my Etsy shop - possible last chance

It looks like I'll be taking my etsy inventory down to the local yarn shop for sale over Christmas. So this is going to be your last chance to buy my yarn on etsy for quite a while. It's also your last chance to take advantage of my destash sale and get 35% off your purchase. You just need to type DESTASHTIME in the coupon slot at check out.


The sale is almost over, so take advantage of it while you can.